
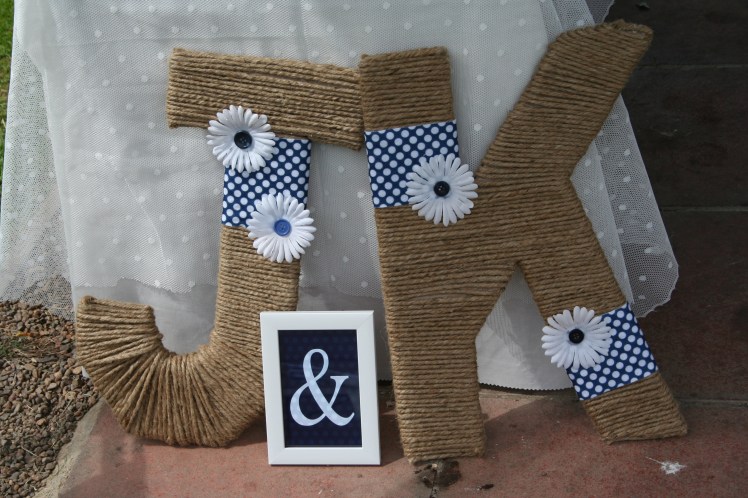
What you need:
– Cardboard letter, this was from hobbycraft but you can find them all over these days.
– Wool/string/coloured garden twine
– Double sided tape
– Scissors
Step 1: Choose your colour and cut small strands for the end of the letter, tape down with double sided tape. Then use another layer of double sided on top to start the main layer.

Step 2: Put double-sided tape on the edges and on the curves or tricky edges to prevent the wool from slipping.

Step 3: Start at one end and wrap the wool tightly around. Wrap all the straight edges first using the tape to end each section. Then wrap the corners last to overlap and gaps.

Tip: if you want to change colours and add stripes then use the tape to end and start each new colour, preferably on the back so it’s unseen.
I did this one as a gift so wrapped in brown paper and used the same colour strip to tie up.

You could take them a step further and create large one with cardboard cut from boxes. These were created for an outdoor wedding. I use very thick jute twine for thes. Again from the garden section in hobbycraft.

One thought on “How to… Wool wrapped letters”